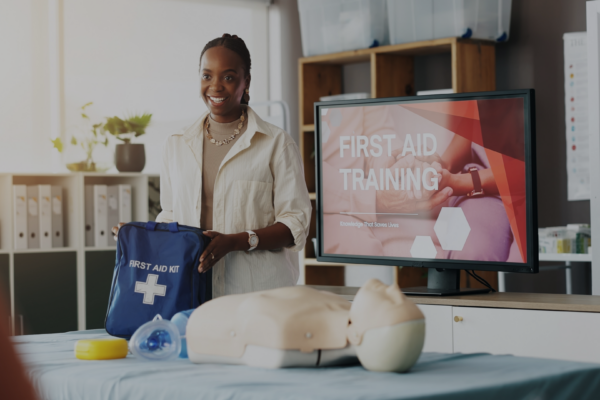
If your students can’t come to you, use technology to go to them! Instructor-led online learning is teaching the same way you always do, but via two-way video conferencing instead of in person. Think about how you interact with friends and family using Facetime, Skype or Google chat, then extend that to doing the knowledge development or “dry” practical application parts of a PADI® course that way. Get creative!

 Using existing PADI materials and live online contact, you can do much of (or all of) what you normally would when students come to the dive center. You can even bring the dive center to them by walking onto the showroom floor and showing them what you’re talking about – pieces of equipment, how to care for a wetsuit, etc. You can pull up photos of your last dive trip to create excitement about the open water dives. You can do this all from your devices – smartphone, tablet or laptop computer. Encourage discussion between students in your online classroom that lead to dive buddy friendships. The possibilities are endless.
Through instructor-led online learning, you can even teach a few PADI courses that don’t require dives, start to finish. Read on for some ideas and examples of how you can create diving excitement and foster learning for students in the comfort of their homes.
Which courses?
You can lead knowledge review for any course online. For example, during a PADI Open Water, Advanced Open Water or Rescue Diver course, go over missed knowledge review questions via a video chat. Have a question/answer session mid-course to see how everyone’s doing – prime it with some common questions students ask. Use video clips to preview inwater sessions. Show videos from your dive trips and training dives to encourage excitement about what they’ll be doing further on in the course.
The PADI Divemaster course offers great opportunity for instructor-led sessions, particularly in areas that can challenge students such as dive theory.
Knowledge development for several specialties lend themselves nicely to creative online interaction. For example, the Digital Underwater Photography course includes viewing, then discussing different photo techniques and conducting editing workshops. Fish Identification is another good example, where you can upload photos and videos of local species and teach students how to identify fish by their colors, shapes and features.
When both instructor and students use mobile video so the instructor can assess performance, learning and ensure engagement, these specialty courses can be conducted by the instructor online in their entirety:
Project AWARE – This newly-revised course is well suited to live webinar format. Download the specialty course lesson guides from the Project AWARE site and have students download the Project AWARE® 10 Tips for Divers to Protect the Ocean Planet. Put them in touch with ways they can become active with the 10 Tips for Divers Action Kit. Work through Take Action Workshops together online and review the Knowledge Review.
Equipment Specialist – It’s best to have divers complete Equipment eLearning, which provides good base knowledge. You conduct a knowledge review discussion online and conduct practical workshops with students using video chat. Have students follow your demonstrations while using their own gear. Give examples of proper equipment care, how to make minor wetsuit repairs, how to assemble a spare parts kit, etc. Engage divers and assess learning. Use Equipment eLearning as a tool to show video clips of how a regulator works, etc.
Enriched Air Diver – One of the most popular specialties on the planet, Enriched Air Diver is another ideal course to facilitate online. Students work through independent study materials (eLearning or printed manual), you show video via webinar and if necessary, proctor the exam via the cameras.
Due to the more academic nature of this course, scheduling sessions mid independent study is ideal to ensure thorough understanding and offer question/answer time. You can schedule dives, or the predive simulation exercise when appropriate.
Or, if logistics prevent it, you can conduct the predive simulation option via live chat without actually having to go to a fill station. This means the student has to demonstrate all steps of analysis for you via video, and all steps of setting a computer, showing you what’s being done. Completing the fill log can be done with a shared version of the PADI fill log sheet. The instructor also verifies correct contents tags, which can be share documents based on the analysis. Your students will need a gas analyzer, EANx air cylinder, air cylinder and an EANx computer. In quarantined areas, think of creative solutions, such as providing drive through stations to pick up this equipment, or delivery of equipment to a student’s home (ensuring you are following all recommendations of local authorities) . Wipe down equipment with disinfection solution before and after pick up.
Assess that students meet all performance requirements. Do as much as you can do. Track what training was completed and finish any remaining portions when you can meet in person.
Technical Advice and Resources
In setting up online interactive instructor-led training, there are some technical requirements that you generally need to meet — but fortunately, they’re pretty simple, and you and your students may already have everything. The main requirements are that both you and your students have the required apps, that you have contact information for connecting, and you have the scheduled time. In choosing apps you can use, here some considerations:
- Class size — some apps better are suited for large groups
- Screen sharing — allows you to “show and tell” for knowledge development, such as making points while showing video
- Live document sharing — useful for working on something at the same time, such as when reviewing dive physics problems; everyone can make changes rather than simply watch
- Intended presentation/interaction — e.g., if you want to live demonstrate equipment setup, or have students show you what they’re doing, you probably want a mobile device compatible app
While there are many excellent “virtual classroom” apps that can be useful for diver instruction, for instructor-led internet instruction, there are other, more widely used apps that can work quite well. There are three main types to look at, with the most common characteristics:
Meeting/Webinar Apps
- suited for large and small student numbers
- participant video, two-way interaction
- screen sharing (transferable during the session)
- private and shared text
- connection links compatible with common schedule apps invitations
- subscription paid by host only
- supported by all browsers, mobile app versions available
Common examples include Go to Meeting/Go to Webinar (https://www.gotomeeting.com/), and Zoom (https://zoom.us)
Mobile Communication Apps
- suited to one-on-one and small groups
- mobile suited, but desktop apps available
- text
- no or limited charge for app and use
Some allow file sharing. The most common examples are Skype (applies to most devices) and Facetime (Apple devices only).
Shared Document Apps
- shared simultaneous use of word and spreadsheet documents
- browser supported
- mobile apps available
- can used simultaneously with mobile communication apps
- file sharing
- no/low charge for limited use
The most common examples are Google drive, Dropbox and Slack.
HOW TO 1. Get Ready
Choose Platform – Decide what platform works best for you and your students. If you haven’t used it before, download and practice with it, check out YouTube “how to” videos.
Inform students – Prepare how-to information about downloading and using the platform that you can insert into course welcome emails sent to students. Let your students know the approximate length of the online session, all materials and equipment necessary, and the protocol as to when cameras will be required for interaction and how to ask for a break when necessary so no crucial information is missed.
Test Run – Do a run-through of how your virtual classroom will work:
- What you will be presenting
- What techniques you’ll use to engage discussion
- What you’ll show live in terms of demonstrations and what you’ll put on screen (videos, photos, lesson guides, etc.)
- How you’ll measure student comprehension

Tips
Ensure you have loaded everything you need on your device, and have your on-camera visuals ready and easily accessible during training.
Practice with a colleague switching off playing roles of instructor and student so you get the chance to see it from both angles.
Your on-screen presence is important. Adjust lighting so that students can clearly see your face and anything you’re showing or demonstrating. Wear what you would wear teaching in class.
Having two-way camera ability is important to see your students for interaction and assessment. Smart phones are great for this.
HOW TO 2. Get set
Set more than one class day/time to give students timing options.
Organize sessions in one-hour slots. If you need to plan longer sessions, work in breaks or movement into your class – just as you would during in-person teaching.
Post your social media class invitations.
Ensure your students have the required materials to get them started in the usual way.
Handle course paperwork in advance. You can use digital forms, form-fillable versions from the Pros’ Site, or email forms and ask the students to sign, scan and return (or take a photo of it and send it to you).
HOW TO 3. Go
On the virtual class day, sign into your platform 5-10 minutes early and make sure your camera and audio is working, you are well lit, and you have everything you need for the session.
Check to see that you have all course administrative paperwork.
Keep your camera on you as much as possible to develop a rapport with your students. When appropriate, encourage students to keep their camera on, or turn it on when they have a question or are speaking so you see each other.
Use Referral and Training Records to document knowledge development completion, and when not using eLearning, obtain copies of the student’s completed Knowledge Reviews.